
While heading to a salon and treating yourself to a luxurious mani-pedi might be tempting, you probably don’t actually have the time or the budget to do so regularly. However, your hands do suffer daily with repetitive chores like cooking, cleaning, or shoveling snow in the dry winter cold – and you’ll want to find some way to pamper them occasionally. It is the least you can do after everything you put them through!
For the truly dedicated among us, one option is to register for some classes at an esthetic school and seek out the specialized training you’ll need to perform a manicure like a pro – but if you’re in desperate need of an immediate hand and nail rescue and can’t possibly wait until you’ve completed all of those esthetic courses, you’ll want to continue reading. We’ve got the scoop on everything you’ll need to perform an expert mani in the comfort of your own home.
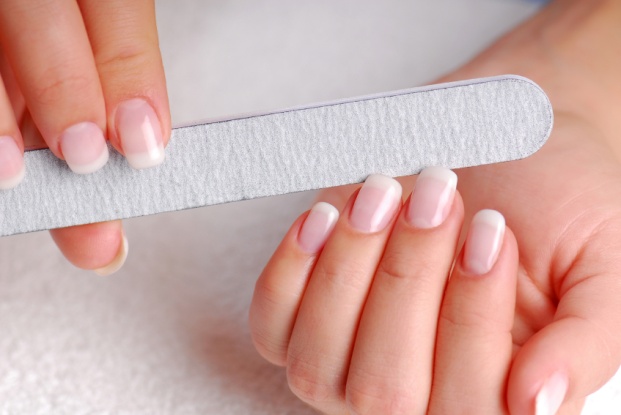
File and Shape
Once your nails are clipped to the length you like (something you should be doing regularly), you’ll want to use a quality nail file for contouring. If you have a friend who’s graduated from an esthetic college, they might recommend using an emery board file as opposed to a metal one, as the latter might cause splintering.
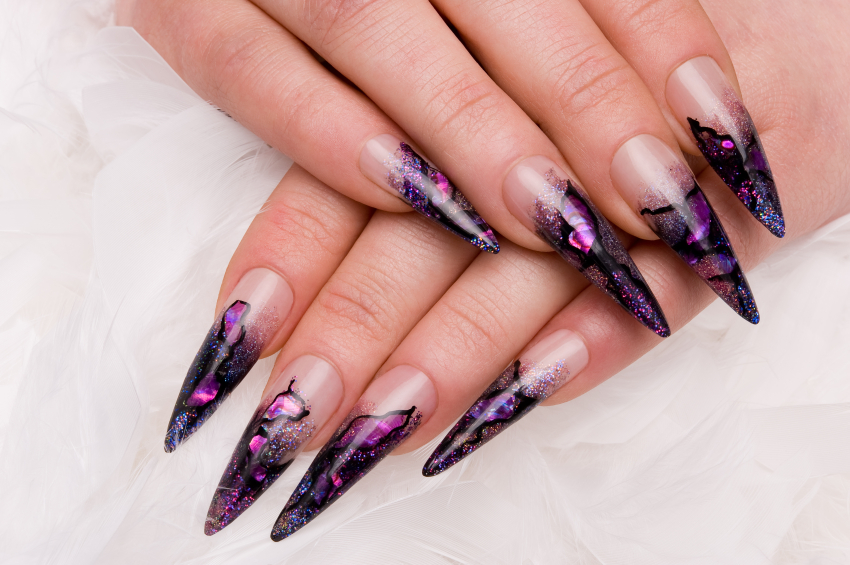
Helpful hint: Take some time to look through a few magazines so you can find just the right shape—there are tons to choose from! Some of the more classic options include round or square tips. But, if you’re up for something more daring, you might try a provocative stiletto nail—which happens to be a very hot trend right now. Would you try this look?
Treat Your Cuticles
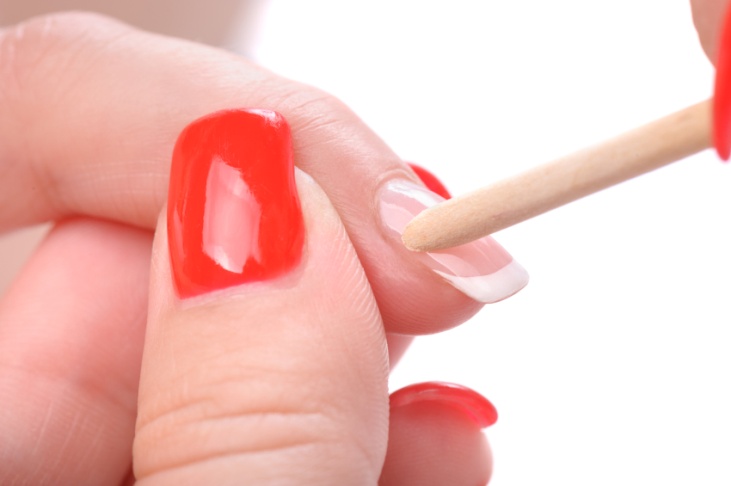
Esthetics experts always say that cuticle oil should be used regularly and not just when you’re giving yourself a manicure. It’s a nourishing conditioner for your cuticles and can help protect against painful hangnails. After you’ve filed, shaped and buffed your nails, you’ll want to soak your hands in a bowl of warm water—try adding a gentle cleanser or Epsom salts. Once you’ve soaked and dried, you can moisturize your fingers with cuticle oil. Then, use a cuticle pusher tool to very GENTLY push back your cuticles. You might notice that some excess skin has built up after performing this task—if so, trim the skin build-up with a pair of nippers.
Helpful hint: When trimming your cuticle skin, keep in mind that it’s always better to under-trim than to over-trim! You need to guard against cutting into fresh skin, as it’s painful and destroys the look of your manicure
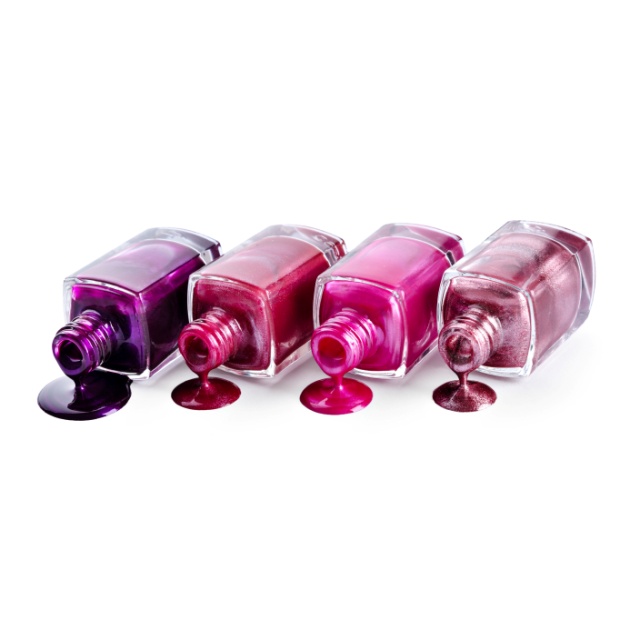
Spin the Colour Wheel
The final stage of your manicure might present a bit of a challenge—because there are so many colours to choose from! Should you embrace the winter season and opt for a shade of blue or grey? Or should you rebel and go with a warmer coral or hot pink? Unfortunately, you’re on your own in making that decision. Just keep in mind that if you want your manicure to really last, you’ll want to use a basecoat and a top coat to really in the colour.
Helpful Hint: Apply two coats of polish to enhance the colour and harden the nails, making them a little more durable. Be sure to let each coat dry completely before applying another. Once you’ve applied your topcoat and allowed your nails to fully dry, use some cuticle cream to moisturize.
What’s your go-to winter nail colour? And what do you think of the stiletto style?
Recent Comments